> For the complete documentation index, see [llms.txt](https://wiki.project-fika.com/llms.txt). Markdown versions of documentation pages are available by appending `.md` to page URLs; this page is available as [Markdown](https://wiki.project-fika.com/joining-a-fika-server/connect-using-a-vpn.md).
# Connect using a VPN
Step-by-step process for joining a Fika server using a VPN client.
{% hint style="warning" %}
Free VPNs services are known to cause performance or connectivity problems, so use at your own risk. The officially supported way of playing Fika is with port forwarding. We will not provide support for issues caused by VPN services.
Custom firewalls such as **BitDefender** may also block your connection while playing. Make sure that you allow the connection or temporarily disable it while playing!
You may also experience issues if you are using another VPN service, even if it is disabled. If you have problems, consider uninstalling any other virtual network adapters.
{% endhint %}
{% stepper %}
{% step %}
### Download Radmin client
Navigate to the [Radmin website](https://www.radmin-vpn.com/) and download the Radmin VPN client.
{% endstep %}
{% step %}
### Install Radmin client
Run the installer and proceed with the installation steps.
{% endstep %}
{% step %}
### Reboot your computer
This is important to ensure that the virtual network adapter is correctly installed. **Do not skip this step!**
{% endstep %}
{% step %}
### Open Radmin
Open Radmin VPN client from the taskbar or from the start menu.
{% endstep %}
{% step %}
### Join the server host's Radmin network
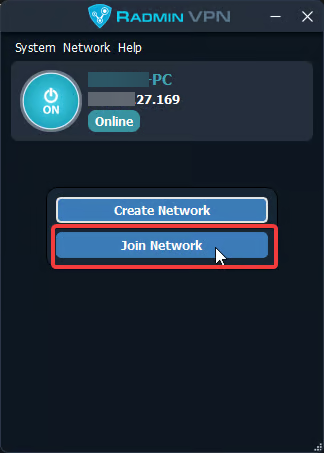
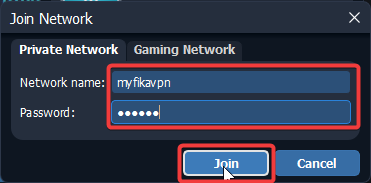
Click `Join network`.
Enter the network name and password used by the server host.
{% endstep %}
{% step %}
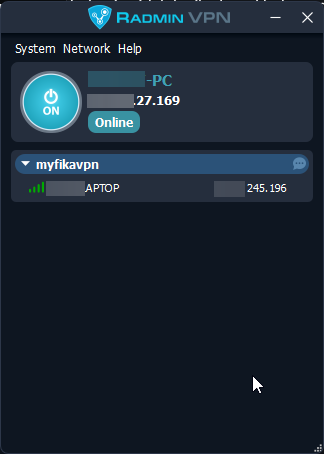
### Validate that you can see server host
You should now be able to see the list of connected peers including the host.
{% endstep %}
{% step %}
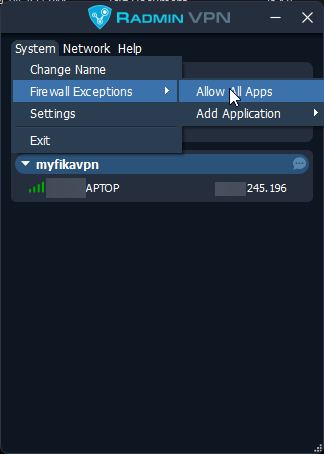
### Add Radmin to Windows firewall exclusions
Go to `System` -> `Firewall Exceptions` and click `Allow All Apps`.
{% endstep %}
{% step %}
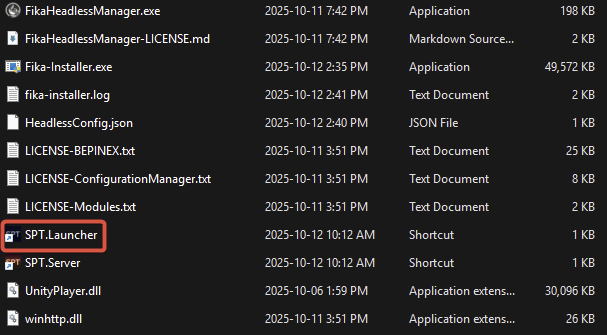
### Start `SPT.Launcher`
{% endstep %}
{% step %}
### Open `SPT Launcher` settings
Click `Add New Server`
{% endstep %}
{% step %}
### Connect to the server host
Give the new server a name and enter the **host's VPN address and port** in the address section.
{% endstep %}
{% step %}
### Create your profile
Other profiles that already exist on the server will show up the first time you connect. Do not log in to someone else's profile, create your own profile.
{% endstep %}
{% step %}
### Start the game
{% endstep %}
{% endstepper %}